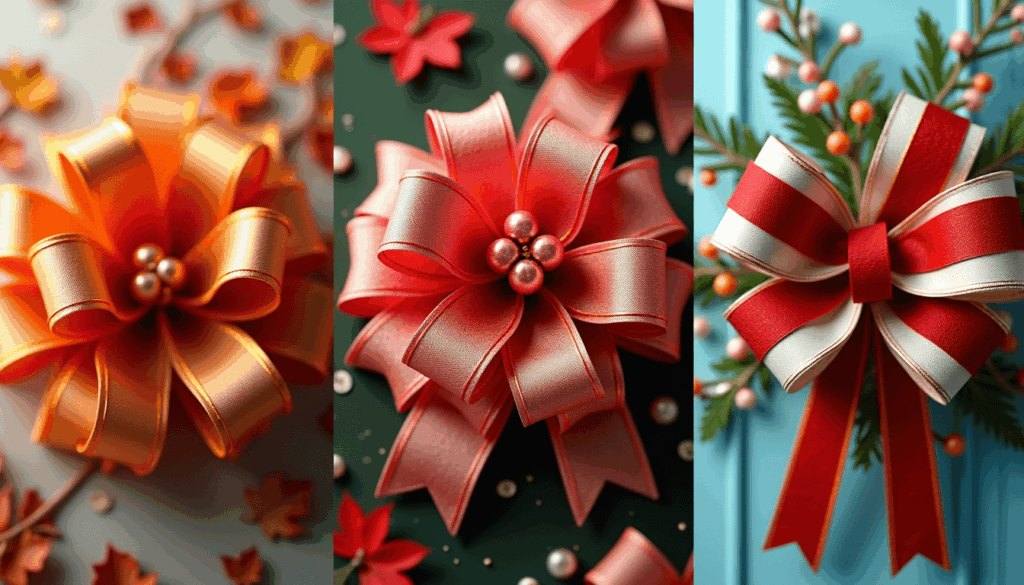
Make a Perfect Bow: Essential Tips and Tricks
Creating beautiful, professional-looking bows starts with properly measuring and cutting your ribbon. Whether you’re wrapping gifts, creating decorations, or working on craft projects, this comprehensive guide will help you achieve perfect bows every time.
Essential Tools and Materials for Making Bows
Before you begin, gather these supplies:
- Sharp scissors – For best results, use fabric or ribbon scissors with a micro-serrated edge. Avoid using these scissors for paper, as it will dull the blades and can cause ribbon fraying.
- Measuring tape or ruler
- Straight pins or clips to hold ribbon in place
- Pencil or disappearing ink marker for marking measurements
- Heat sealing tool or lighter (for synthetic ribbons)
- Self-healing cutting mat (optional but recommended)
- Metal-edged ruler for straight cuts, optional but recommended
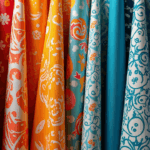
Understanding Ribbon Types and Their Properties
Different ribbons require different handling techniques, and understanding their unique characteristics is crucial for achieving perfect bows and avoiding common pitfalls. The material, weave, and finish of a ribbon all play significant roles in how it behaves during cutting, folding, and tying.
Wired Ribbon
- Properties: These ribbons have thin wires running along their edges, allowing them to be shaped and manipulated into specific forms. This is incredibly useful for creating bows with dramatic loops and curls that hold their structure indefinitely.
- Handling: While the wire makes them versatile, it also requires a different cutting technique. You’ll need wire cutters or strong scissors capable of cutting through the wire without damaging the blade. The wire can also be sharp, so careful handling is advised to prevent pricking your fingers.
Satin Ribbon
- Single-faced satin: Shiny on one side and matte on the other. This means you need to be mindful of which side is showing when creating loops and folds to ensure the glossy finish is always visible.
- Double-faced satin: Shiny on both sides, making it more forgiving as you don’t have to worry about the “wrong” side showing. This is often preferred for more intricate bows where both sides of the ribbon might be exposed.
- Properties: Satin ribbons are generally soft, pliable, and drape beautifully. They can fray easily if not cut with sharp scissors, and their smooth surface can sometimes make them slippery to work with. Heat-sealing the ends can prevent fraying.
Grosgrain Ribbon
- Properties: Distinguished by their ribbed texture, grosgrain ribbons are much stiffer and more structured than satin. This makes them excellent for holding their shape, which is ideal for bows that need to be sturdy and maintain a crisp form. They are less prone to fraying due to their tight weave, but still benefit from a clean, sharp cut.
- Handling: Due to their rigidity, grosgrain ribbons may require a bit more effort to tie into tight knots and loops. They are less likely to slip, offering better control during the tying process.
Organza Ribbon
- Properties: These ribbons are lightweight, translucent, and delicate. They create ethereal and elegant bows with a lot of volume and movement. However, their delicate nature makes them prone to wrinkling and tearing if not handled carefully.
- Handling: Cutting sheer ribbons requires exceptionally sharp scissors to prevent snags and uneven edges. Fraying is a common issue, and a light application of fray-check or heat-sealing can be beneficial, though heat-sealing should be done with caution due to their synthetic composition. Their transparency also means that any underlying knots or imperfections will be visible.
Velvet Ribbon
- Properties: Luxurious and soft to the touch, velvet ribbons add a touch of opulence to any project. They have a distinct pile on one side, which can create a beautiful sheen and depth.
- Handling: Velvet ribbons can be thick and sometimes bulky, requiring a firm hand when tying. The pile can also make them a bit more challenging to achieve precise folds. Cutting them cleanly is important to avoid a messy edge where the pile has been crushed. They are not prone to fraying in the same way as satin but can shed fine fibers if not cut well.
Natural Fiber Ribbons (e.g., Cotton, Linen, Jute):
- Properties: These ribbons offer a rustic and natural aesthetic. They are often less polished than synthetic ribbons and may have a slightly irregular texture.
- Handling: Natural fibers can be prone to fraying, and their stiffness can vary. They generally hold knots well but may not create the crisp, structured loops of grosgrain or wired ribbons.
Tips for All Ribbon Types:
- Sharp Scissors are Key: Regardless of the ribbon type, using sharp fabric scissors is paramount to achieving clean, precise cuts and minimizing fraying. Dull scissors will crush and damage the ribbon fibers.
- Practice Makes Perfect: Before committing to your final project, practice tying bows with a scrap piece of the same ribbon. This will help you understand its unique properties and how it behaves when folded and tied.
- Consider the End Use: The type of ribbon you choose should always align with the intended purpose and desired aesthetic of your bow. A delicate satin bow might be perfect for a gift, while a sturdy grosgrain or wired bow might be better for a wreath.
Measuring Techniques for Different Bow Styles
Basic Bow Measurements
- Rule of thumb: For each loop, measure twice the desired loop diameter plus 1 inch for overlap
- For a basic 4-loop bow with 3-inch loops: (3″ × 2 × 4) + 8″ for tails = 32″ total
Tailored Bow Formula
- Decide how many loops you want
- Determine your desired loop size
- Calculate: (Loop diameter × 2 × number of loops) + (tail length × 2) + 2″ for center knot
Classic Gift Bow
- For a 3″ diameter bow: approximately 36″ of ribbon
- For a 5″ diameter bow: approximately 54″ of ribbon
- For an 8″ diameter bow: approximately 72″ of ribbon
Precision Cutting Techniques
Preventing fraying
For synthetic ribbons (satin, organza, polyester):
- After cutting, carefully pass the edge near a flame (don’t touch the flame)
- Hold for 1-2 seconds until edge slightly melts and seals
- Allow to cool completely before handling
For fabric ribbons (cotton, linen):
- Apply a thin line of fabric glue or clear nail polish to the edge
- Let dry completely before handling
- Alternatively, fold under the raw edge and secure with fabric glue
Tips for achieving clean cuts
- Place ribbon flat on cutting surface
- For straight cuts, use a metal-edged ruler as a guide
- Cut with a single, firm motion rather than several small cuts
- Keep scissors sharp – dull scissors cause fraying and uneven edges
- Cut at a slight angle (approximately 45°) for cleaner edges
Step-by-Step Measuring and Cutting Process
For a Classic Multi-Loop Bow:
- Determine total ribbon needed:
- For a 5-loop bow with 4″ loops and 8″ tails: (4″ × 2 × 5) + (8″ × 2) + 2″ for center = 58″ total
- Prepare your work surface:
- Lay ribbon flat on cutting mat or clean surface
- Measure total length needed and add 1″ for safety margin
- Mark your ribbon:
- Use pins or a disappearing marker to indicate cut line
- For multiple bows, mark intervals along ribbon
- Make the cut:
- Hold ribbon taut but not stretched
- Cut with sharp scissors in one smooth motion
- Immediately treat cut edges to prevent fraying
Avoid These Common Mistakes to Make a Perfect Bow
- Cutting ribbon too short – Always add extra length; you can trim excess later
- Using dull scissors – Results in jagged edges and fraying
- Skipping edge treatment – Untreated edges unravel and look unprofessional
- Measuring stretched ribbon – Measure in natural, relaxed state for accuracy
- Ignoring ribbon width – Wider ribbons require more length for the same loop size
- Cutting all ribbon at once – Better to cut as you go and adjust as needed
Advanced Tips for Perfect Bows
- For layered bows: Cut inner layer ribbons 1″ shorter than outer layer ribbons
- For professional-looking gift wrapping: Cut ribbon length to wrap around package 1.5 times
- For consistency: Create a cardboard template of your most common bow sizes
- For wired ribbon: Trim wire back slightly from edges to prevent poking
- For perfect tails: Cut ends at an inverted “V” or diagonal for a professional finish
Ribbon Length Cheat Sheet
With these techniques and measurements, you’ll be creating beautiful, professional-looking bows for any occasion. Remember that practice makes perfect, and don’t be afraid to experiment with different ribbon types and sizes to develop your own signature bow styles.
| Bow Type | Ribbon Width | Small Bow (3” or 7.62cm) | Medium Bow (5” or 12.7cm) | Large Bow (8” or 20.32cm) |
| Basic Loop | 1/4″ to 5/8″ | 24” | 36” | 54” |
| 0.635cm to 1.5875cm | 60.96cm | 91.44cm | 137.16cm | |
| Basic Loop | 7/8″ to 1.5” | 30” | 45” | 60” |
| 2.2225cm to 3.81cm | 76.2cm | 114.3cm | 152.4cm | |
| Multi-Loop | 1/4″ to 5/8″ | 36” | 54” | 72” |
| 0.635 cm to 1.5875 cm | 91.44cm | 137.16cm | 182.88cm | |
| Multi-Loop | 7/8″ to 1.5” | 45” | 60” | 84” |
| 2.2225cm to 3.81cm | 114.3cm | 152.4cm | 213.36cm | |
| Cascading | Any | 60” | 72” | 96” |
| Any | 152.4cm | 182.88cm | 248.92cm |